 |
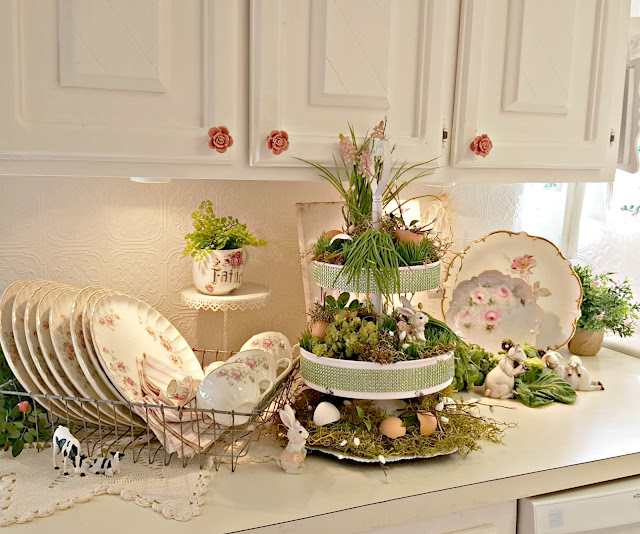
I styled my tiered stand for spring and for once I remembered to take a few photos to share as I worked....lol! |
 |
See how it has sections that you can easily cut apart with a pair of scissors. |
 |
I cut my grass in pieces that will fit snugly in my tiered stand sections. Don't worry if they don't fit exactly, I'll show you later how to fix that. |
 |
It took one sheet of grass to fill the sections in my tiered stand. |
 |
I wanted to use some real egg shells in my design, so I have been saving them for a few days. See over on the kitchen counter...... |
 |
I just wash the shells and let them dry for a few days. |
 |
I tucked a little dried material in my egg shells and added a sprig of small pussy willow (the willow came from Michaels, in the Easter isle) |
 |
Once you get the grass in place, you are only limited by your imagination on how to complete your design. I used a few succulents and some small bunnies. |
 |
Can you guess what we are having for lunch today? |


Very Cute!, Hugs
ReplyDeleteLOVE EVERYTHING YOU DO.
ReplyDeleteWonderful!!! Well done again dear Penny
ReplyDeleteHugs Alessandra
I love how you've filled your tiered stand with greenery, Easter eggs, and bunnies for spring. It looks fanciful and romantic for spring.
ReplyDeleteSo pretty! Love the grass....may have to get some!! I adore the trim! The use of the eggs was such a great idea......
ReplyDeleteHugs,
Debbie
Such fun, please share where all the magic happens, lol. Very fresh and green, my favorite, Sandi
ReplyDeletePenny,
ReplyDeleteThis design is filled with spring and all its festivities. Thank for sharing with TADA this week. See ya next Thursday with some more of your gems.
Happy Creating,
Karen Marie
Love what you did with the grass. I saw it at Michaels the other day and considered it but did not realize how the bottom was constructed and that you could cut it so easily! Thanks for sharing. It looks adorable!
ReplyDeleteLove this so much! Am going to be putting aside my eggshells now. So happy I found you at the #HomeMattersParty.
ReplyDeleteIdeal para Pascua.
ReplyDeleteBesos 😘😘😘
OMG That is the cutest thing!!!
ReplyDeleteChippy White Cottage Blessings,
Rebecca
what a beautiful spring decor pretty
ReplyDeletecome see us at http://shopannies.blogspot.com
Your decorated tiered stand is so cute. Where did you find such a cute stand?
ReplyDeleteI never could figure out why a bunny always delivered Easter eggs instead of a chicken seeing how rabbits don't lay eggs.
So cute Penny. It's almost as if you've created a fairy Easter garden. I love it!!
ReplyDeleteI am so in love with this! I just grabbed one of my tiers wondering what in the world I should do with it. what a great inspiration, especially the shells. Just wanted to let you know that this post will be featured this week on TADA! Thursdays. Thanks for joining in.
ReplyDeleteSuch a wonderful tutorial Penny! I love your step by step to creating a beautiful spring display. Thanks for linking up your posts with us at Vintage Charm :)
ReplyDeletePenny, this is so pretty & perfect for spring / Easter! Thanks for sharing at the #InspirationSpotlight Party. Pinned & Shared.
ReplyDeletePenny, your tiered stand is so pretty and you have it styled beautifully. Thank you for sharing at the Snickerdoodle Create~Bake~Make link party!
ReplyDelete